Showreel from Elissa Boswell on Vimeo.
Here is a showreel displaying all of the work I have done on After Effects throughout the year.
Monday, 9 May 2016
Saturday, 7 May 2016
C4D Can and Bottle Packaging Design

The first step was to import the file into C4D and used tool to create the cylindrical can shape. We then created the lid which was fairly easy to do using the different view settings and seeing it from a range of angles simultaneously. After this we made a material which would wrap around the perimeter of the can and for this we just imported the imagery provided earlier. Adding a reflective surface effect on the outside of the can really enhanced the 3D feel and I decided to use the colour orange as a contrasting background in order to portray the design as clearly as possible. The final step was to add a spotlight before rendering.
Next we tested out some of the techniques we had previously learnt to create a bottle package design. Again we were provided with an outline and the imagery to apply and I found this useful as I believe that after taking part in this workshop I can create my own imagery and apply it to a digital bottle/can with confidence.
Similarly to the creation process of the can we used the lathe tool on the outline in order to create a 3D bottle shaped. We then added a preset 'green glass' material and used the shape tool to create a tube which wrapped around the bottle. The next step was to add the label as a new material and use the alpha channel to remove the background. We applied the design to the tube shape which gave the appearance of a wrap-around label.
The bottle top was created in a few simple steps by merging 3 circles and a 12 sided star. To this we added a preset metal texture and added the label using another alpha channel.

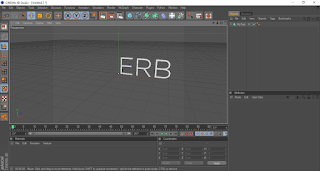
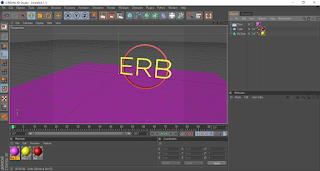
CAD - Dynamic Type

Next we created 4 individual letters and made them a 'child' of the emitter.

Next I added a dynamic body tag to all of the letters which gave them mass so they would interact with each other rather than just moving straight down.

Then I added a large letter E and a floor, for all the letters to fall on and interact with further.

Next I added different colours to each of the letters so that they would be more easily distinguishable when they where falling. Finally I added some spotlights and shadows and rendered out the final result

Overall, I am not particularly happy with the final result but am very happy with the techniques I learnt. These are definitely tools I would like to use and experiment with in future.
C4D - 3D Type
In this week's workshop we learnt how to create 3D logos using Cinema 4D. We created the initial outlines in illustrator and imported them in to C4D. Next we extruded the outlines in order to create 3D versions of our letters. The next step was to draw a tube shape around the letters and extrude that to create a 3 dimensional floating border. Then we added simple colours to each of the components and also to the floor of the workspace in order to create a contrasting background. The final step was to add lights in order to give the logo an even more 3 dimensional feel.


Fairytale Statistic Infographics
Fairytale Statistic Infographics from Elissa Boswell on Vimeo.
In this lesson we used the foundation of a well-known fairytale in order to animate info-graphics. For this I chose the frog prince.
We first created a scene in Illustrator which consisted of different layers to allow the manipulation of individual components. Next we imported these layers into After Effects and added motion keyframes along with the relevant statistical text. Overall I am quite happy with how my animation came out. I feel the techniques I learnt were useful and I could definitely apply them to future work. I would like to develop this project further in my own time.
Stop Motion Analogue Communique - Let Go
letgo from Elissa Boswell on Vimeo.
In this week's session I decided to use the same medium of cotton wool but to form a slightly different message. I chose to use the phrase 'Let go' as I felt this was something I could portray effectively through the cloud-like appearance of my materials.
I began by creating a template using tracing paper. This didn't have to be too precise at this stage as I was aware that I would make a further template from acetate and then cover this with the cotton wool. I deliberately made the template of the two words joined together as my plan was to create a stop motion video of the two words separating much like clouds would in the sky. I felt this technique would not only connected the motion to the words but also the material I had used.
Once I had made the acetate template I tacked it down to a board and cut it in the areas where I wanted the letters to separate. This meant that I could keep the words together for the application of the cotton and also that the material would separate more naturally when I pulled the acetate apart. I then used pva glue to stick on the cotton wool ensuring that all areas of the plastic were covered. Finally I laid the piece out on the same blue background I have previously used in the analogue communique project and separated the letters taking photographs at every step. I tried to keep each movement slight and kept in mind the movement of clouds and how they would move independently.
I was really happy with my final outcome as I feel it gave off the effect I was striving for.

Sketch Effect Animation (Using Clipping Masks)
Forest: Just One Day from Johnny Kelly on Vimeo.
In the week's After Effects session I learnt how to use clipping masks in order to convey an effect a digital image being hand-sketched. I began by drawing a simple shape and drew over it twice using tracing paper. This would create three separate images which appeared identical to the naked eye but would in fact be slightly different due to them being hand-drawn. I specifically created 3 different versions of the image as when overlaid it would create a flickering effect when looped. With an even number of images a pattern may be more noticeable and this would not be beneficial in achieving the sketchy hand-drawn effect we were going for. After overlaying and looping the images we used a clipping mask to draw over the lines in the way we would like the to appear on screen. I tried to work from the bottom to the top of the diamond but it was difficult to make this appear as one continuous line as the shape was made up of so many lines which went in different directions.
Overall I was happy with my final outcome and even added a little twinkle to the diamond to finish off the video.
James Braithwaite - I Met the Walrus from POCKO on Vimeo.
Clipping Path Diamond from Elissa Boswell on Vimeo.
Subscribe to:
Comments (Atom)